Blog

Your blog category

Blog, Networking

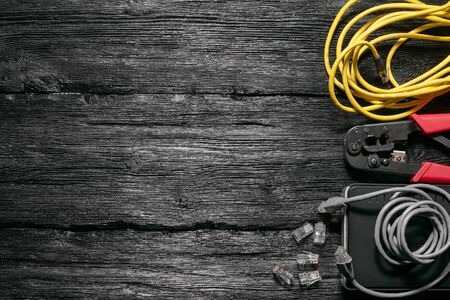
Essential Tools for Network Cable Wiring

When it comes to building or maintaining a reliable wired network, the quality of your cables matters, but so does the precision of how they’re made. Whether you’re setting up Cat5e, Cat6, or Cat7 cables, having the right tools can make the difference between a clean, high-speed connection and a frustrating mess of dropped signals and intermittent connectivity. Let’s go over the most essential tools used for network cable wiring, their purpose, and how to use them properly. Cable Stripper The first step in creating an Ethernet cable is removing the outer jacket cleanly without nicking the internal wires.A cable stripper allows you to quickly expose the twisted pairs by scoring the insulation evenly around the cable. Pro Tip: Adjustable strippers are best for different cable categories (Cat5e–Cat8). Avoid: Using a knife — it often cuts too deep and damages the copper conductors. You can get it from Amazon. Crimping Tool Once your wires are arranged correctly (T568A or T568B), a crimping tool secures the RJ45 connector to the cable ends.A high-quality crimper ensures: Solid connection between pins and copper conductors Even pressure for reliable data transmission Longer connector life Pro Tip: Choose a ratcheting crimper with replaceable dies for professional use — it provides consistent results and reduces hand fatigue. You can get it from Amazon.   RJ45 Connectors & Boots RJ45 connectors are the plug ends that attach to your cable. Choose connectors that match your cable category and type (solid vs. stranded). Newer version called Pass-through. Cable boots (the rubber covers) protect the clip from snapping and keep the bend radius within limits. Pro Tip: Pass-through RJ45 connectors are great for beginners — you can visually confirm the correct wire order before crimping.   You can get it from Amazon. Cable Tester After wiring both ends, testing your cable is a must.A network cable tester checks continuity, pin alignment, and pairing integrity — confirming there are no shorts or miswires. Basic Testers: Verify if all eight wires are connected properly. Advanced Testers: Measure signal loss, crosstalk, and certification for Cat6/Cat7 compliance. Pro Tip: Always test before installation, redoing a buried or wall-mounted cable can be time-consuming. You can get it from Amazon. Cable Management Tools Professional-looking installations also require organization tools like: Velcro ties (for adjustable bundling) Cable raceways or trays (to protect wiring) Labels (for easy troubleshooting later) Pro Tip: Never zip-tie cables too tightly — it can distort the pairs and reduce performance. You can get it from Amazon. Tone Generator & Probe Kit Optional but Handy If you’re tracing cables through walls or ceilings, this tool combo helps you identify which cable goes where.The tone generator sends an audible signal through the wire, and the probe detects it on the other end,  saving hours during troubleshooting. You can get it from Amazon. Investing in the right network cabling tools means faster installation, fewer connection issues, and a cleaner, more professional setup. At Microsys, we use industry-grade tools to ensure every cable meets performance standards, so your business network runs fast, stable, and error-free.

Blog, Networking

Differences Between Ethernet Cables Categories

When it comes to networking, not all Ethernet cables are created equal. Whether you’re wiring a small office or upgrading your home network, the type of cable you choose determines how fast and reliable your connection will be. At Microsys, we often get asked: What’s the real difference between Cat5e, Cat6, Cat7, and Cat8 cables — and which one should I use?Let’s break it down simply and clearly. What Does “Cat” Mean? “Cat” stands for Category, and each number (5e, 6, 7, 8) represents a performance standard defined by the Telecommunications Industry Association (TIA).As the category number increases, so do speed, bandwidth, and signal quality. Cat5e – Enhanced Performance for Everyday Networking Cat6 — Faster, Cleaner Signal for Modern Networks Cat7 — Shielded for Stability and Speed Cat8 — The Future of Networking Speed: Up to 1 Gbps (Gigabit Ethernet) Bandwidth: 100 MHz Maximum Distance: 100 meters (328 ft) Shielding: Typically unshielded (UTP), but shielded (STP) versions exist Connector Type: RJ45 Cat5e (Category 5 Enhanced) replaced older Cat5 cables and remains common in residential and small business networks. It supports Gigabit Ethernet and is great for general web browsing, video streaming, and small office LANs. Microsys Tip: If you already have Cat5e installed, it’s still perfectly fine for most home users – but upgrading may be worth it for higher network loads or future-proofing. Speed: Up to 10 Gbps (at 55 meters or less) Bandwidth: 250 MHz Maximum Distance: 100 meters for 1 Gbps / 55 meters for 10 Gbps Shielding: UTP or STP available Connector Type: RJ45 Cat6 cables use tighter twists and improved insulation to reduce crosstalk and electromagnetic interference (EMI). They’re ideal for environments with high data usage – such as offices, gaming setups, or small data networks. Microsys Tip: Cat6 is often the sweet spot, affordable, reliable, and compatible with most networking equipment. Speed: Up to 10 Gbps Bandwidth: 600 MHz Maximum Distance: 100 meters Shielding: Always shielded (S/FTP – shielded foiled twisted pair) Connector Type: GG45 or TERA (backward compatible with RJ45) Cat7 cables feature individual shielding around each pair of wires, reducing interference to almost zero. This makes them suitable for server rooms, high-performance workstations, and environments with heavy electrical noise. Microsys Tip: While Cat7 offers great performance, its connectors are less common – so it’s mainly used in specialized or professional setups. Speed: Up to 40 Gbps Bandwidth: 2000 MHz Maximum Distance: 30 meters (98.42 ft) Shielding: Fully shielded (S/FTP) Connector Type: RJ45 Cat8 is designed for data centers and enterprise-grade networks. It supports ultra-high speeds over short distances and is backward compatible with previous categories. However, it’s overkill for most home users. Microsys Tip: Cat8 is ideal if you’re building a new server rack or upgrading core infrastructure – but for typical networking, Cat6 or Cat6a provides more than enough performance. Choosing the Right able for You Category Max Speed Bandwidth Shielding Best Use Case Cat5e 1 Gbps 100 MHz Optional Home / Office Basics Cat6 10 Gbps (short runs) 250 MHz Optional Small Business / Gaming Cat7 10 Gbps 600 MHz Shielded Enterprise / Server Rooms Cat8 40 Gbps 2000 MHz Shielded Data Centers / High-End Labs Wiring Standards: T568A vs. T568B No matter which cable you choose, proper wiring is key to performance.Ethernet cables use 8 color-coded wires, arranged in pairs. The two common standards are T568A and T568B. Both perform identically, the only difference is how the color pairs are ordered inside the RJ45 connector.It’s important to use the same standard on both ends of a cable for a straight-through connection. Crossover Pinout This configuration is used for connecting similar devices, such as two computers or two switches, directly without an intermediary device (like a router). In a crossover cable, one end is wired using the T568A standard, and the other end uses the T568B standard. This arrangement ensures that the transmit and receive wires are “crossed” so that the transmitting pins on one end connect to the receiving pins on the other, facilitating communication between the two devices. Which standards to use T568A or T568B? When deciding between RJ45 Color Code A or B, the choice largely depends on compatibility with existing infrastructure and regional preferences. T568A is often used in environments that require backward compatibility with older systems, such as legacy telephone networks or government installations, commonly seen in Europe and the Pacific region. It is the preferred choice when projects involve older systems or require federal compliance due to its backward compatibility with older telecom systems. On the other hand, T568B is more widely adopted in modern commercial and residential networks, aligning better with contemporary equipment and making it the default standard in most telecom installations, particularly in the United States. For most setups, consistency is crucial. If you’re expanding an existing network, it’s best to stick with the current wiring standard. However, for new installations, T568B is often recommended due to its widespread use and better alignment with modern systems​. Lastly, keep in mind that for straight-through cables, use the same standard at both ends, while for crossover cables, mix T568A and T568B to ensure proper data transmission​.

Blog, Excel Tricks

Excel Keyboard shortcuts

Working faster in Excel isn’t just about knowing formulas — it’s about efficiency. Keyboard shortcuts are one of the easiest ways to speed up your daily workflow and reduce repetitive clicks. By mastering a few key combinations, you can instantly navigate between worksheets, format data, and perform complex actions without lifting your hands from the keyboard. This not only saves valuable time but also minimizes strain from constant mouse use. For professionals who spend hours managing spreadsheets, learning shortcuts like Ctrl + Shift + L (to add filters) or Alt + = (to quickly sum columns) can make tasks smoother and more accurate. At Microsys, we encourage users to integrate these small habits — because the more efficiently you work, the more time you have to focus on real problem-solving. Frequently used shortcuts Action Shortcut Open a workbook. Ctrl+O Close a workbook. Ctrl+W Save a workbook. Ctrl+S Go to the File tab. Alt+F Go to the Home tab. Alt+H Go to the Insert tab. Alt+N Go to the Page Layout tab. Alt+P Go to the Formula tab. Alt+M Go to the Data tab. Alt+A Go to the Review tab. Alt+R Go to the View tab. Alt+W Center align cell contents. Alt+H, A, C Add borders. Alt+H, B Delete column. Alt+H, D, C Hide the selected rows. Ctrl+9 Hide the selected columns. Ctrl+0 Copy selection. Ctrl+C Paste selection. Ctrl+V Cut Selection. Ctrl+X Apply bold formatting. Ctrl+B Undo recent action. Ctrl+Z Remove cell contents. Delete [Button] navigating in cells shortcuts Action Shortcut Move one cell up in a worksheet. Up arrow key Move one cell down in a worksheet. Down arrow key Move one cell left in a worksheet. Left arrow key Move one cell right in a worksheet. Right arrow key Move to the edge of the current data region in a worksheet. Ctrl+Arrow key Move to the previous cell in a worksheet or the previous option in a dialog box. Shift+Tab Move to the last cell on a worksheet, to the lowest used row of the rightmost used column. Ctrl+End Extend the selection of cells to the last used cell on the worksheet (lower-right corner). Ctrl+Shift+End Move to the cell in the upper-left corner of the window when Scroll lock is turned on. Home+Scroll lock Move to the beginning of a worksheet. Ctrl+Home Move one screen down in a worksheet. Page down Move to the next sheet in a workbook. Ctrl+Page down Move one screen to the right in a worksheet. Alt+Page down Move one screen up in a worksheet. Page up Move one screen to the left in a worksheet. Alt+Page up Move to the previous sheet in a workbook. Ctrl+Page up Move one cell to the right in a worksheet. Or, in a protected worksheet, move between unlocked cells. Tab key Open the list of validation choices on a cell that has data validation option applied to it. Alt+Down arrow Cycle through floating shapes, such as text boxes or images. Ctrl+Alt+5, then the Tab key repeatedly Exit the floating shape navigation and return to the normal navigation. Esc Scroll horizontally. Ctrl+Shift, then scroll your mouse wheel up to go left, down to go right Zoom in. Ctrl+Alt+Equal sign ( = ) Zoom out. Ctrl+Alt+Minus sign (-)

Blog, Windows Tips

Bypassing a Windows 11 login screen

Many Windows 11 users feel a bit boxed in during setup. The Out-of-Box Experience (OOBE) strongly encourages , and in most editions, requires, signing in with a Microsoft account before you can reach the desktop. For home users who prefer a purely local account or who are setting up a shared or offline machine, this can be frustrating. While Microsoft’s intent is to provide tighter security, seamless cloud backups, and cross-device sync, it often feels like personal choice has been taken away. Here are the steps to bypassing a Windows 11 login screen Win11 23H2 Win11 24H2 When you reach the “Let’s connect you to a network” screen: press Shift + F10 to open a Command Prompt window. Type the command  OOBEBYPASSNRO and press [Enter]. The system will reboot. After the reboot, proceed with the setup. When you return to the network screen, you should see an option to select “I don’t have internet” and then “Continue with limited setup,” which allows you to create a local account.   When you reach the “Let’s connect you to a network” screen: press Shift + F10 to open a Command Prompt window. Type the command  start ms-cxh:localonly and press [Enter]. Next, a screen will appear allowing you to create a local user account.

Blog, Windows Tips

Essential Windows Tricks to Boost Your Productivity

At Microsys, we know that small computer shortcuts and time-saving habits can make a big difference in your daily workflow. Whether you’re managing files, multitasking, or troubleshooting system issues, Windows offers dozens of built-in features that most users overlook. Here are some powerful Windows tips and tricks to help you get more done, faster, smarter, and with fewer headaches. 1st Tips Master Keyboard Shortcuts for Instant Productivity Forget reaching for your mouse. Windows keyboard shortcuts can save minutes every hour. Here are some must-know combos: Win + D ____________________ Win + D Show or hide the desktop instantly. Win + L ____________________ Win + L Lock your computer immediately (great for office security). Win + Tab ____________________ Win + Tab Open Task View to manage virtual desktops. Alt + Tab ____________________ Alt + Tab Switch between open apps quickly. Ctrl + Shift + Esc ____________________ Ctrl + Shift + Esc Open Task Manager directly. Win + I ____________________ Win + I Open Settings. 2nd Tips Snap, Split, and Organize Your Windows Like a Pro Multitasking just got easier! Windows allows you to snap windows to any corner or side of the screen. Drag a window to the left or right edge to split the screen in half. Use Win + Arrow keys to position apps quickly. For four-way snapping, drag a window to a corner or use Win + Up/Down arrows after snapping left/right. 📈 Great for comparing spreadsheets, watching tutorials while you work, or managing multiple browser tabs side-by-side. 3rd Tips Clean Up and Speed Up Your PC with Built-in Tools No third-party app needed! Use Disk Cleanup and Storage Sense to free up space and boost performance. To open Disk Cleanup: Search for “Disk Cleanup” in the Start menu. Choose a drive and click OK. Check unnecessary items (like temporary files and Recycle Bin). To enable Storage Sense: Go to Settings → System → Storage. Turn on Storage Sense. ⚡ Microsys Tip: Run Disk Cleanup weekly, especially if you download or install programs often. 4th Tips Use Windows Search Efficiently Instead of digging through folders, let Windows do the work. Simply press Win + S or click the search icon and type what you need: apps, settings, documents, or even web results.You can also use filters like: type:pdf → shows only PDF files. modified:this week → finds files changed recently. size:>50MB → lists large files to clean up. 💡 These advanced searches make finding files faster and help you keep projects organized. 5th Tips Use Virtual Desktops to Stay Organized If you’re juggling multiple projects, virtual desktops can help you separate your tasks neatly. Press Win + Tab → Click New Desktop at the top. You can switch between desktops with Ctrl + Win + Left/Right Arrow.Use one desktop for work, another for personal tasks, and another for ongoing projects — without cluttering your main workspace. 6th Tips Protect Your Privacy and Security Windows includes powerful built-in security tools that most users ignore. Windows Security (Defender) automatically protects against viruses and malware. Controlled Folder Access can block unauthorized apps from changing files. Windows Update keeps your system patched against new threats. 🛡️ Microsys Tip: Always allow your system to install critical security updates automatically. If you suspect malware, contact Microsys, we handle virus cleanup, data protection, and full security audits. 7th Tips Troubleshoot Common Issues Easily Windows includes several automated troubleshooters that can fix issues in minutes. Go to Settings → System → Troubleshoot → Other troubleshooters and you’ll find options to fix: Internet connection issues Audio/sound problems Printer or Bluetooth connectivity Windows updates that fail to install 💡 Microsys Tip: Run troubleshooters first before spending hours searching online — they often fix issues automatically. 8th Tips Personalize Your Experience Make your PC truly yours by customizing themes, colors, and taskbar behavior: Settings → Personalization → Colors to match your style. Taskbar settings let you hide widgets or move icons. Create custom shortcuts on your desktop for your most-used apps. A personalized workspace can boost focus and comfort during long work sessions. 9th Tips Take Screenshots the Easy Way Need to capture something on your screen? Skip the Print Screen button!Use Win + Shift + S to open the Snipping Tool, where you can draw a selection and copy the image immediately.Perfect for sharing support issues or training materials with your IT team. 10th Tips Restart Regularly to Keep Your PC Healthy Believe it or not, one of the simplest maintenance tasks is often ignored, restart your computer.A weekly restart clears temporary files, resets memory, and keeps updates running smoothly. 💡 Just like people, your computer works better after a short break. Final Thoughts Windows is full of hidden tools designed to make your life easier, once you know where to look. By applying these simple tricks, you’ll spend less time fixing problems and more time being productive. At Microsys, we specialize in helping individuals and businesses make the most of their technology, from computer repair and network setup to website design and IT consulting. If you’re looking for expert support or need help optimizing your computers, reach out today: 📧 Email: info@microsyscs.com📞 Phone: 203.951.9199   Let Microsys handle your IT, so you can focus on what matters most.

Blog, Excel Tricks

Excel Tricks to Save You Time

Whether you’re creating reports or tracking expenses, Excel is one of the most powerful tools for professionals. Here are three quick tips to help you get more done, faster. Use Flash Fill If you start typing a pattern in a new column (like first names from full names), Excel automatically recognizes it. Just press Ctrl + E to fill the rest instantly. Freeze Rows or Columns Keep headers visible while scrolling through long sheets: Go to View → Freeze Panes and choose your preferred option. Turn Data into Tables Instantly Select your data and press Ctrl + T, Excel automatically formats it as a table with filters, easy sorting, and total options. Instantly Remove Duplicates If you’re working with long lists, like customer names or inventory.Excel can remove duplicate entries in seconds: 1) Select your data range. 2) Go to the Data tab → click Remove Duplicates. 3) Choose the columns to check and click OK. ✅ Excel will keep one copy of each unique entry. Perfect for cleaning up contact lists or reports before importing data elsewhere. Combine Text from Multiple Cells with One Formula Need to merge first and last names, or city and state into one cell? Use the TEXTJOIN function for clean, flexible results. Example: =TEXTJOIN(” “, TRUE, A2, B2)This joins the text in A2 and B2 with a space in between, skipping any blank cells automatically. Use Conditional Formatting to Highlight Important Data Bring your data to life by letting Excel highlight what matters most. For example, to highlight sales over $10,000: 1) Select your range. 2) Go to Home → Conditional Formatting → Highlight Cell Rules → Greater Than… Enter 10000 and choose a format (like green fill). Quickly Insert Today’s Date or Time No need to type dates or times manually. Use these shortcuts instead: Ctrl + ; → today’s date Ctrl + Shift + ; → current time Combine both for a full timestamp! ⏰ Great for logs, reports, or tracking entries. Create a Chart in Seconds Turn your data into a clear visual instantly: 1) Highlight your data (include headers). 2) Press Alt + F1 for an in-sheet chart (or F11 for a new sheet). 3) Adjust the style using Chart Design. 📊 Perfect for quick visual summaries or presentations. Use Conditional Formatting to Highlight Important Data Bring your data to life by letting Excel highlight what matters most. For example, to highlight sales over $10,000: 1) Select your range. 2) Go to Home → Conditional Formatting → Highlight Cell Rules → Greater Than… Enter 10000 and choose a format (like green fill).

Are You Ready To Start

New Relation With US?

Have a question or need IT support? Reach out to our team, we’re ready to help you with reliable, fast, and personalized service.

Reach out to Microsys, We’re Just a Call or Click Away.

Contact

© 2018 – Microsys Computer Solutions, LLC

error: Content is protected !!
Scroll to Top